S&W M19 Detailed Stripping
Posted: Tue Jul 27, 2010 7:23 am
Pictures and instructions from detail strip of an S&W M19
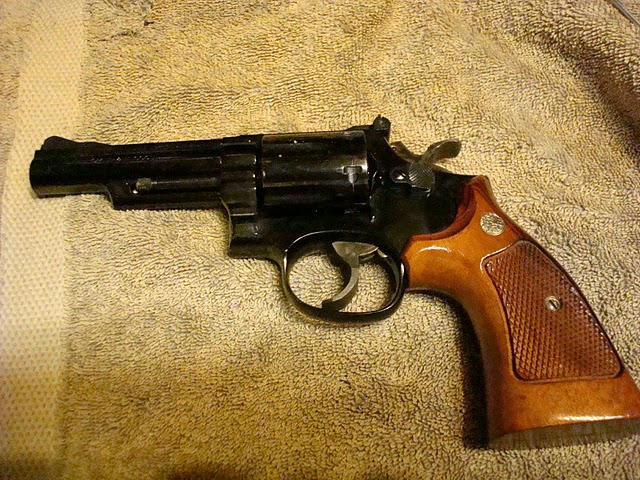
1) Remove the grips.

2) Flip over the revolver
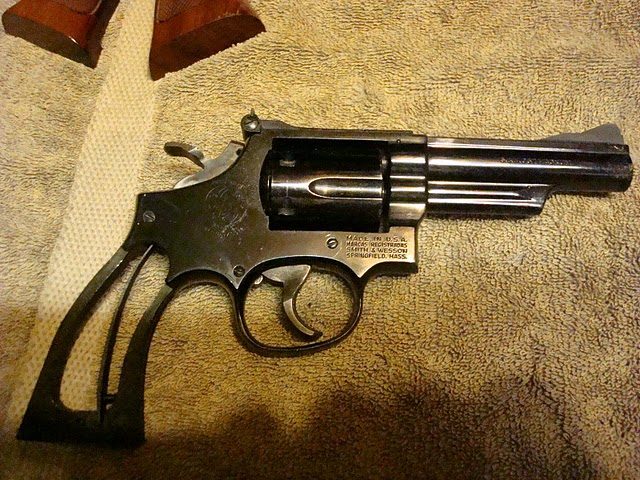
3) Remove the three screws in the revolver's side plate. The foremost screw secures the cylinder and yoke.
It is special, set this screw aside because you don't want to confuse it with one of the other screws.
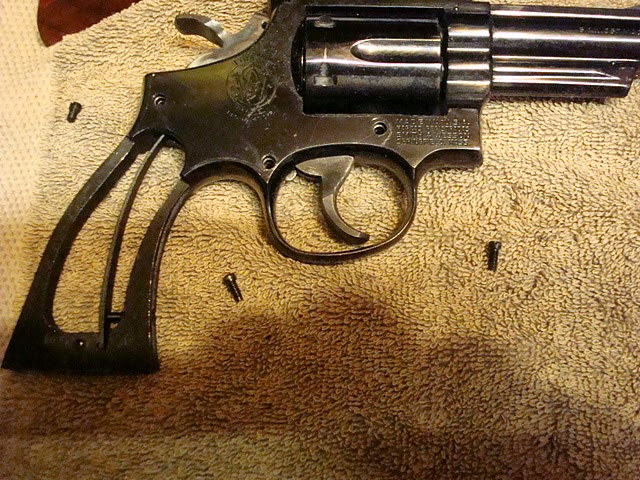
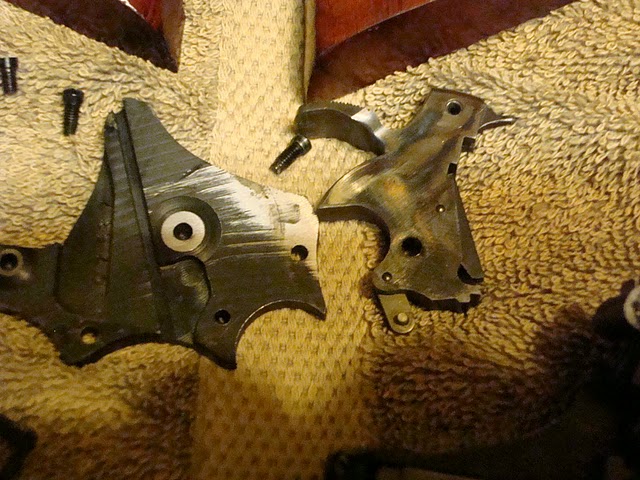
4) Using the handle of a hammer or non-marring mallet, rap on the grip frame to "rattle" the side plate off.
The hammer block mechanism can now be picked up and set aside.
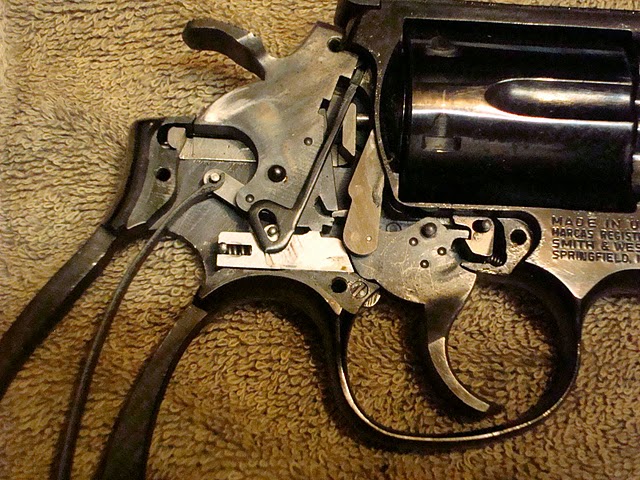
Side plate (inside view)

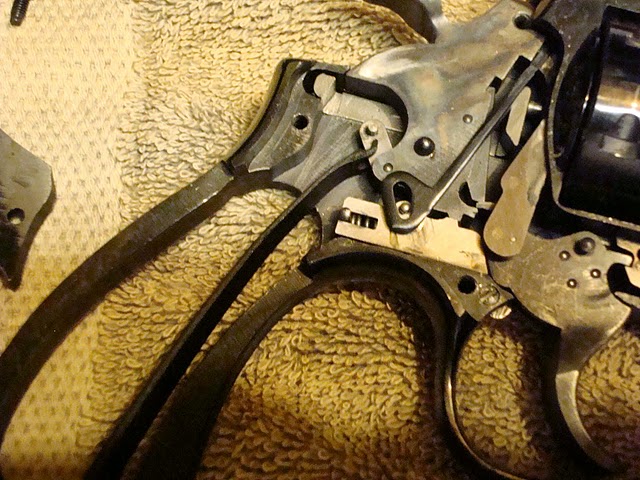
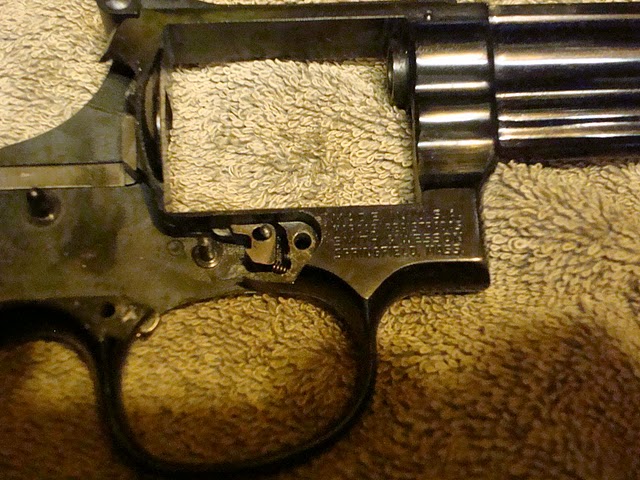
5) Loosen the screw for the hammer spring (located on the front strap of the frame near the butt).
You may unhook the hammer spring from the stirrup and remove it.
6) You can use a flat bladed screwdriver to push the rebound slide spring in and lift it up from the pin.
The rebound slide and slide spring may now be removed.
7) Cock the hammer such that it may be disengaged from the trigger. You should be able to disengage it
and lift the hammer from the frame.
8) Set the hammer aside
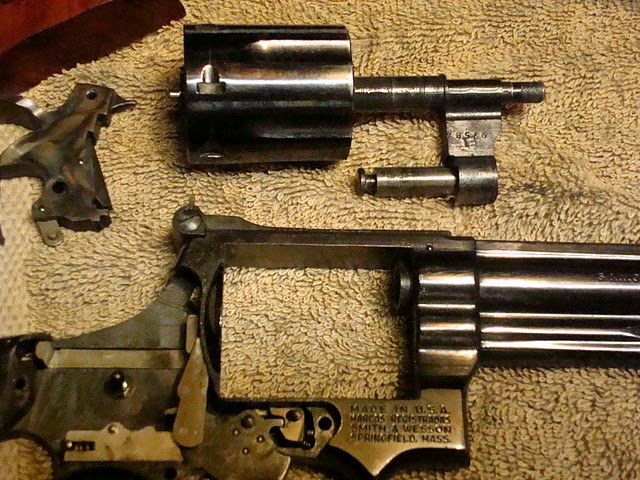
9) Depress the cylinder release and open the action. The cylinder and yoke comes out now. Note: if you
remove the cylinder and yoke before you remove the hammer, you'll find the bolt" prevents the
hammer's rearward rotation; making it difficult to remove.
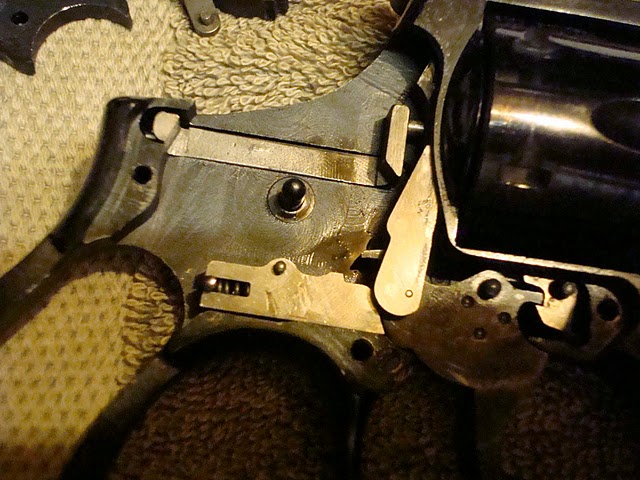
10) Remove the cylinder stop spring and next the cylinder stop assembly itself.
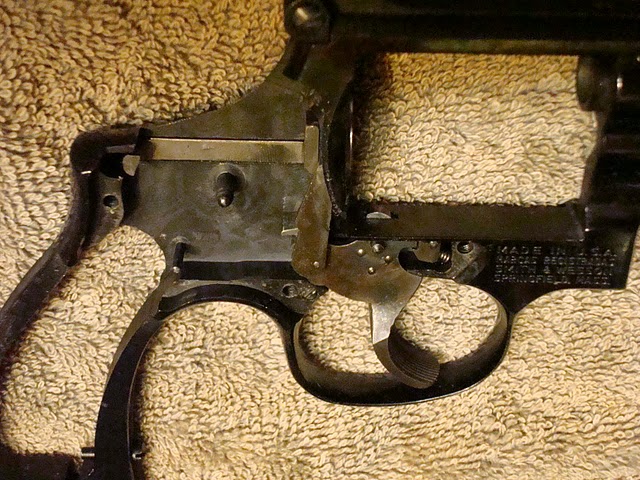
11) Depress the trigger to clear it and lift it out of the frame.

Frame shown with the trigger, cylinder stop spring, and cylinder stop assembly removed.
Detail stripping complete. Reassemble in reverse order. If you feel a little overwhelmed, take photos at each step,
prior to removing any of the parts. This will better help you remember their orientation of each part as it goes back
into the frame. There's always that one part which doesn't want to go back correctly and is difficult to recall the
exact way it fit.
The rebound slide assembly has a fairly strong spring. It requires some effort to insert.
Pay attention to the hammer block during assembly. It may fall off the little nub and may not fit into the slot on the cover.
1) Remove the grips.
2) Flip over the revolver
3) Remove the three screws in the revolver's side plate. The foremost screw secures the cylinder and yoke.
It is special, set this screw aside because you don't want to confuse it with one of the other screws.
4) Using the handle of a hammer or non-marring mallet, rap on the grip frame to "rattle" the side plate off.
The hammer block mechanism can now be picked up and set aside.
Side plate (inside view)
5) Loosen the screw for the hammer spring (located on the front strap of the frame near the butt).
You may unhook the hammer spring from the stirrup and remove it.
6) You can use a flat bladed screwdriver to push the rebound slide spring in and lift it up from the pin.
The rebound slide and slide spring may now be removed.
7) Cock the hammer such that it may be disengaged from the trigger. You should be able to disengage it
and lift the hammer from the frame.
8) Set the hammer aside
9) Depress the cylinder release and open the action. The cylinder and yoke comes out now. Note: if you
remove the cylinder and yoke before you remove the hammer, you'll find the bolt" prevents the
hammer's rearward rotation; making it difficult to remove.
10) Remove the cylinder stop spring and next the cylinder stop assembly itself.
11) Depress the trigger to clear it and lift it out of the frame.
Frame shown with the trigger, cylinder stop spring, and cylinder stop assembly removed.
Detail stripping complete. Reassemble in reverse order. If you feel a little overwhelmed, take photos at each step,
prior to removing any of the parts. This will better help you remember their orientation of each part as it goes back
into the frame. There's always that one part which doesn't want to go back correctly and is difficult to recall the
exact way it fit.
The rebound slide assembly has a fairly strong spring. It requires some effort to insert.
Pay attention to the hammer block during assembly. It may fall off the little nub and may not fit into the slot on the cover.