Failure to Fire Issue

The place to discuss the inner workings of firearms.

Moderators: Bullseye, Moderators

User avatar
Hakaman
Master contributor
Master contributor
Posts: 1940
Joined: Thu Jan 15, 2009 8:51 pm
Location: detroit, michigan

Post by Hakaman » Sat Aug 20, 2011 1:23 pm

In the photo below, it shows two FTF's, and two normal firings. The top two rounds are "Blazer" manf loads, and the bottom two rounds are my own reloads. You will notice the two rounds on the left of the photo are the failures, one from Blazer, and one of mine. I shot a full box of blazer, and of the 50 rounds, only one failure, shown in the top left of the photo. I then shot 20 rounds of my own loads (gluteus maximus kickers) and had one failure, shown in the bottom left of the photo. I then had one of my fellow shooters look at the blazer failure and he said the primer was seated too low in the pocket, but that's how they all appeared to be. The reload primer appears a little low in the failure round as opposed to the ignited round, but that is from the detonation pressure. I personally could not tell the difference between primer seating in any rounds, before firing.
Personally, my take on all this is:
1) My revolver is functioning just fine, there isn't any reason for a light strike based on my inspection of the firing pin and bushing.
2) The misfires, FTF's, are either a result of poor primer seating.
or
The oncoming round backing out of the cylinder slightly from the concussion of the previous round firing (this is my bet on what is happening).


Image

User avatar
blue68f100
Master contributor
Master contributor
Posts: 1997
Joined: Mon May 25, 2009 10:31 pm
Location: Piney Woods of East Texas

Post by blue68f100 » Sat Aug 20, 2011 3:41 pm

Is there any mechanism that prevents the hammer from hitting the FP?

I'm wondering if a FP rebound spring is not bring the FP up where the Hammer can hit it. Can the cylinder move forward so FP to primer gap is too far?

Primers can be set as low as 0.004" below the surface and never have a problem. I have never seen a primer set too low so it would not go off. Is it possible, yes but very unlikely. There would have to a lot of stuff on the ragged edge (out of spec) for this to be the case.
David

SS MKIII 6 7/8" Fluted Hunter. Mueller Quick Shot, Bushnell 2x Scope, Hogue Rubber Grips
Custom Built 1911

User avatar
Bullseye
Site Admin/Host
Site Admin/Host
Posts: 6382
Joined: Sun Aug 14, 2005 12:23 pm
Location: USA

Post by Bullseye » Sun Aug 21, 2011 1:07 pm

You mentioned this problem was on your S&W 686, have you checked the mainspring strain screw? This is the screw on the lower edge of the front strap of the frame and it sets tension on the mainspring. It may be loose and backing out under detonation forces or be set a little to light from the trigger job work. Hopefully your gunsmith who did the work didn't shorten the screw to make the trigger pull lighter. Try turning the screw inward one half turn to increase tension on the mainspring a little bit more. Afterwards you will need to apply a little blue Loctite to the screw to prevent any other unintended movement.

R,
Bullseye
Image

User avatar
Coach1
Regular contributor
Regular contributor
Posts: 210
Joined: Tue Oct 12, 2010 3:09 pm
Location: Apex North Carolina

Subject matter experts ...

Post by Coach1 » Mon Aug 22, 2011 10:10 am

Wow. Even if that bit of guidance from Bullseye does not fix the problem.. It is still impressive - clear, precise, complete and easy to understand. And typical of the caliber of the support on this forum.

Good luck.
"You can't always get what you want. But if you try sometimes, you just might find, you get what you need." The Rolling Stones

User avatar
bearandoldman
Ye Loquacious Olde Pharte
Posts: 4194
Joined: Tue Aug 16, 2005 10:30 am
Location: Mid Michigan

Post by bearandoldman » Mon Aug 22, 2011 12:40 pm

Well. I had a fail to fire myself yesterday in one of my hand loads in my 1894C. Got to believe it was a primer problem. Benn using CCI primers ;lately because that is what they had at the LGS. OI know they are the harder ones and the Federals are the softest as I have been told. Been shooting these for a while at least the last 500 rounds are so and only have had a couple that failed to fire and had a light primer hit. This one I put back in and tried again and it worked and left a bigger primer dent, got to believe it was on that had not been set deep enough. The first hit seated it and the second fired it. Have see this on one of my .22LR guns also as it has a tight chamber and CCI subs with their longer driving band sometime do not seat deep enough to go off, pull the bolt back and hit it again and it will fire. If it happens with factory loads it may be the gun , if with hand loads, well?
You have great day and shoot straight and may the Good Lord smile on you.
Image

User avatar
Hakaman
Master contributor
Master contributor
Posts: 1940
Joined: Thu Jan 15, 2009 8:51 pm
Location: detroit, michigan

Post by Hakaman » Mon Aug 22, 2011 5:14 pm

I'm feeling a little bit bad right now, here are a couple of photos of my "strain
screw". I took BE's advice and checked the screw, and it is obvious what the
so-called gunsmith did to it. As I research the internet for understanding, this
is the "cheap and dirty" method of softening the trigger pull. The problem with
this method, well, I think we all know now, it is inconsistant. I have also included
a link to Midway showing what the tip should look like, quite a difference!:oops:
http://www.midwayusa.com/viewproduct/?p ... ber=515288
I am glad, at the same time, because I think it should be fixed upon replacing
the obliterated pin that I presently have in the gun. I will order a new one this
evening from Midway and should have it by weeks end. I will post range results
with the new pin installed.
Thanks for all the help,
Haka


ImageImage

User avatar
Bullseye
Site Admin/Host
Site Admin/Host
Posts: 6382
Joined: Sun Aug 14, 2005 12:23 pm
Location: USA

Post by Bullseye » Mon Aug 22, 2011 6:37 pm

It is clear that the strain screw has been altered on the contact edge. But I also noticed that your Midway part # did not have the 686 model number. Do you have a 686? If you do, then the strain screw part for that model is slightly different-

http://www.midwayusa.com/viewProduct/de ... ber=781378

Notice the head of the replacement strain screw for the Model 686 is shallower than the one you have pictured. Clearly the one you took out has the more prominent head but I wonder if that was the original strain screw or an improper replacement. Might not hurt to get the other one too.

R,
Bullseye
Image

User avatar
Hakaman
Master contributor
Master contributor
Posts: 1940
Joined: Thu Jan 15, 2009 8:51 pm
Location: detroit, michigan

Post by Hakaman » Mon Aug 22, 2011 8:00 pm

I was in a hurry when I posted earlier, but I ordered both of the screws shown in
the links included here. I did that because the allegedly wrong screw looks like
the one that came out of my gun. I'll have to see which one actually works the best.
http://www.midwayusa.com/viewProduct/?p ... ber=781378
http://www.midwayusa.com/viewProduct/?p ... ber=515288
I guess I should be more selective on who works on my gun.
Haka

User avatar
Hakaman
Master contributor
Master contributor
Posts: 1940
Joined: Thu Jan 15, 2009 8:51 pm
Location: detroit, michigan

Post by Hakaman » Wed Aug 24, 2011 4:12 pm

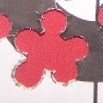
I received the two strain screws from MidwayUSA today(shown in the photo) and took
some measurements from the bottom of the head to the tip of the screw, and logged the results
above each screw. I guess the thickness of the head is insignificant to it's functioning. Although
the screw head that looks most like the original is not the right screw for my revolver, it's the screw
with the smaller head that is for the 686 (according to Midway). I called S&W to get their opinion
on which screw was right for the 686. I had also mentioned that a gunsmith had ground a portion
of the tip off, as a trigger job, and he told me that they(S&W) are the ones who have "filed" the
tip off in order to get it to work the best with my individual revolver ! He said each revolver is unique,
and the tips of the strain screws were filed by them to get the best trigger functioning for each particular
gun. He suggested to use the strain screw that was designed for the revolver from Midway(middle screw)
and check the results. The middle screw was the one I figured on putting in anyway, and his agreement
determined it for sure. I guess each 686 revolver is a "unique" piece? I guess I am not as disgusted
with the gunsmith who worked on my gun as I was at first. I will put the gun to the test and see if it works ok.
Haka


Image

User avatar
Bullseye
Site Admin/Host
Site Admin/Host
Posts: 6382
Joined: Sun Aug 14, 2005 12:23 pm
Location: USA

Post by Bullseye » Wed Aug 24, 2011 5:23 pm

The condition of that screw you pulled out from the pistol leads me to believe it was not cut that way from the factory. They would never have had the metal slagged off to one side like that. They would have cleaned up the edge with a with a stone to chamfer it so the strain screw had the original outer diameter dimensions. Notice the two production originals have beveled edges. True that they often must individually fit internal parts to compensate for manufacturing tolerances but that is not professional looking work, it would never leave my shop like that.

My original line of thinking was to use the center (.350") screw. You were experiencing some light strikes but not many. That hundredth of an inch may be all you need for consistent detonation.

R,
Bullseye
Image

User avatar
Hakaman
Master contributor
Master contributor
Posts: 1940
Joined: Thu Jan 15, 2009 8:51 pm
Location: detroit, michigan

Post by Hakaman » Wed Aug 24, 2011 6:00 pm

Notice the two production originals have beveled edges. True that they often must individually fit internal parts to compensate for manufacturing tolerances but that is not professional looking work, it would never leave my shop like that.
I used the term "ground down" to the service tech from S&W, because that's what it appeared to have been down. He assertively told me that they don't grind, they "file" it off, giving me the impression that they file it "precisely". Your right, whoever did this job did not take very much pride in the job they did. It doesn't give me much of a good feeling knowing I am the recipient of this type of job. I hope it takes care of business now, if not, it's going to a real gunsmith next. I guess I trusted the DSC's gunsmith when I shouldn't have. I am thinking of mentioning this to the president of the club.
Haka

User avatar
Bullseye
Site Admin/Host
Site Admin/Host
Posts: 6382
Joined: Sun Aug 14, 2005 12:23 pm
Location: USA

Post by Bullseye » Wed Aug 24, 2011 6:14 pm

When I looked at your screw "ground down" is exactly what I see. It's looks as if someone touched it to a bench grinder to size that screw. I'm thinking you will be good with the new 686 screw. If you the pull doesn't feel right then you have a little to work with. Remember you shouldn't expect a light trigger on the order of the old one but it shouldn't be a bear to pull either. What you're really going for is 100% reliability. A little heavier trigger pull is better than "click".

R,
Bullseye
Image

User avatar
Hakaman
Master contributor
Master contributor
Posts: 1940
Joined: Thu Jan 15, 2009 8:51 pm
Location: detroit, michigan

Post by Hakaman » Wed Aug 24, 2011 6:43 pm

Bullseye wrote:When I looked at your screw "ground down" is exactly what I see. It's looks as if someone touched it to a bench grinder to size that screw. I'm thinking you will be good with the new 686 screw. If you the pull doesn't feel right then you have a little to work with. Remember you shouldn't expect a light trigger on the order of the old one but it shouldn't be a bear to pull either. What you're really going for is 100% reliability. A little heavier trigger pull is better than "click".
R,
Bullseye
To leave an edge on the tip, like the original, it would take a grinder of some sort. A grinder, I'm guessing, creates molten leading edge to it as it is ground, leaving it as the picture illustrates. I think a file leaves more of a clean finish. I have installed the new 686 strain screw and it does seem a little heavier than the original, but still very comfortable. The tech at smith also said that the longer the strain screw, the "longer" the ratcheting pull will be. Maybe it's my imagination, but it does seem a little longer pull than the original. I suppose I could measure that, but as long as it fires correctly, I think the pull is just fine.
Haka

User avatar
Bullseye
Site Admin/Host
Site Admin/Host
Posts: 6382
Joined: Sun Aug 14, 2005 12:23 pm
Location: USA

Post by Bullseye » Wed Aug 24, 2011 7:06 pm

It's not going to be the same as the old one. Like you said, as long as it fires correctly 100% of the time. Next you should go and test fire it for reliability.

R,
Bullseye
Image

User avatar
Hakaman
Master contributor
Master contributor
Posts: 1940
Joined: Thu Jan 15, 2009 8:51 pm
Location: detroit, michigan

Post by Hakaman » Wed Aug 24, 2011 8:41 pm

Next you should go and test fire it for reliability.

R,
That's what I'll do next, probably this weekend. I post the results.
Thanks for the help,
Haka

Post Reply