The place to discuss the inner workings of firearms.
Moderators: Bullseye, Moderators
-
boltbusterdw
- New member

- Posts: 21
- Joined: Mon Feb 09, 2009 6:12 pm
- Location: St. Louis suburbs
-
Contact:
Post
by boltbusterdw » Thu Feb 12, 2009 11:19 am
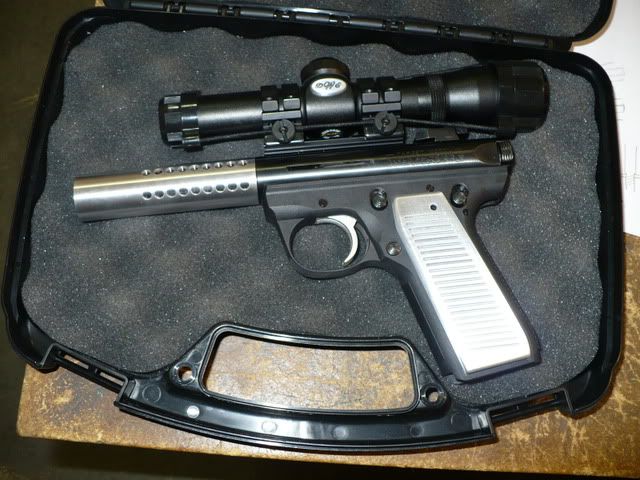
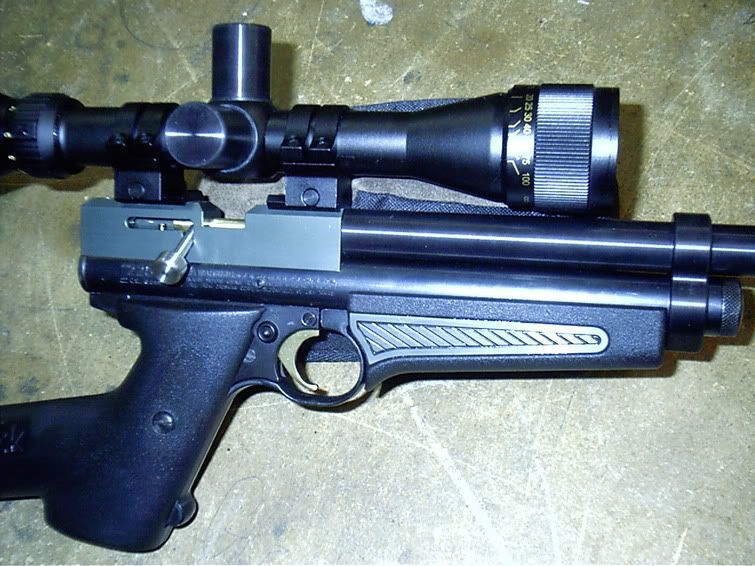
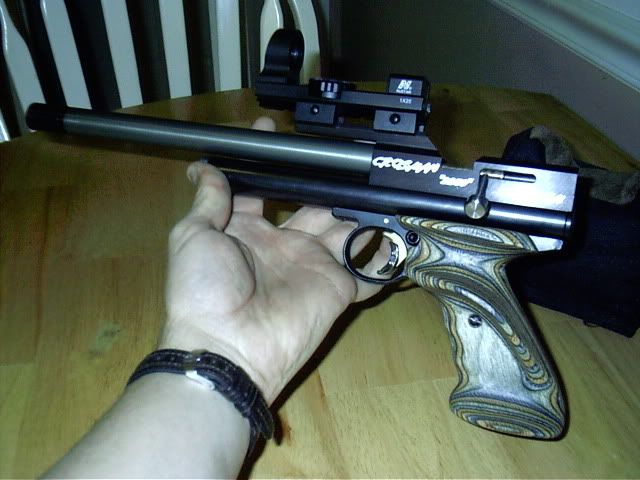
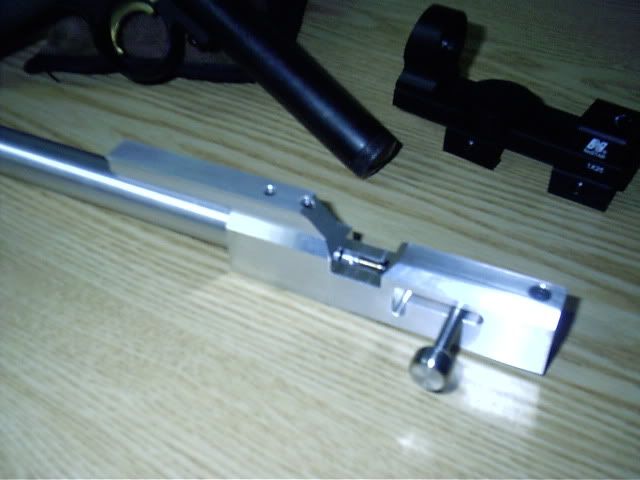
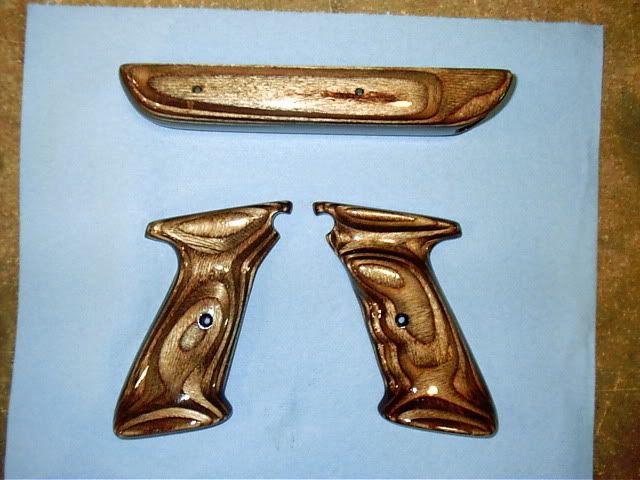
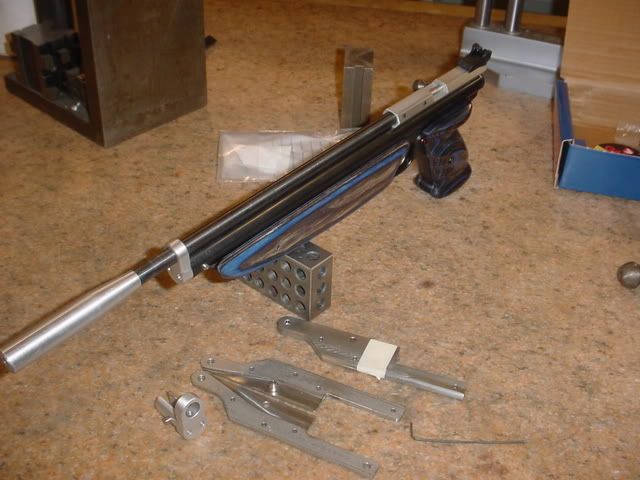
This is my first post here. There is a wealth of information here, thanks mostly to Bullseye. I have recently made a compensator, a set of grips, and a custom scope emblem for my Mark III 22/45. I also have a new scope mount ordered and I plan on anodizing it, along with these other parts olive green. Also on order is a vortz. sear and extractor. here is a picture...
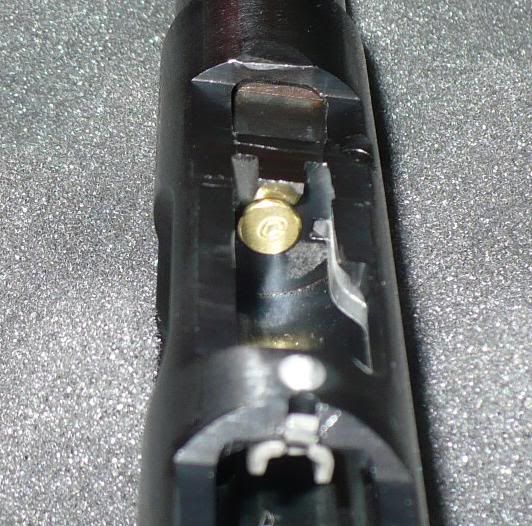
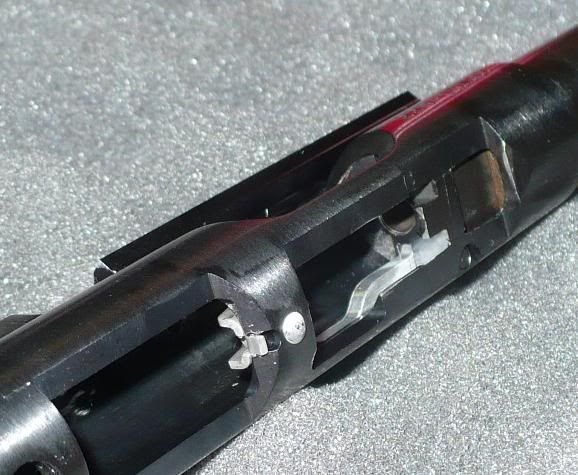
I have also made the safety mag eliminator bushing and have removed the ugly LCI. I made a plug for the gap left from removing it, here is a couple pics...
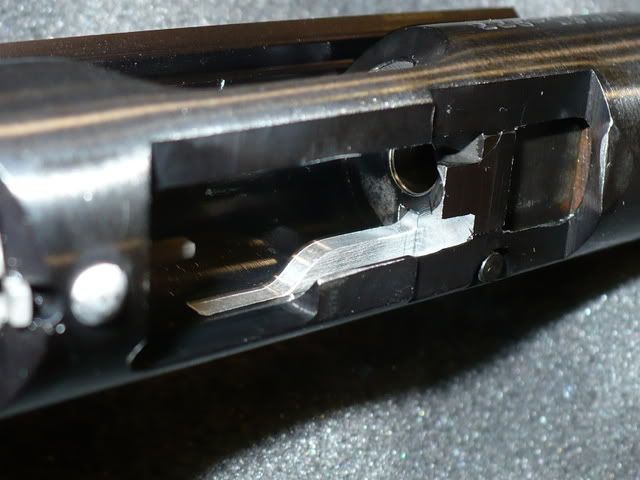
I copied the inside profile from the original plastic LCI and made the outside profile fit the radius machined in the receiver. With the original LCI pin holding it in the cover does not pivot. Does anyone see any safety concerns with this mod? I would think the gun would be safer than leaving the receiver open.
-
SKnight
- Regular contributor

- Posts: 100
- Joined: Thu Nov 20, 2008 11:48 pm
Post
by SKnight » Thu Feb 12, 2009 12:25 pm
Other than the original intent of letting you know there's a round chambered I don't an issue as long as it doesn't pivot and can hit the side of the round.
I will say this, I want one.
Welcome to the site!
-
bearandoldman
- Ye Loquacious Olde Pharte

- Posts: 4194
- Joined: Tue Aug 16, 2005 10:30 am
- Location: Mid Michigan
Post
by bearandoldman » Thu Feb 12, 2009 1:16 pm
SKnight wrote:Other than the original intent of letting you know there's a round chambered I don't an issue as long as it doesn't pivot and can hit the side of the round.
I will say this, I want one.
Welcome to the site!
Why not just leave it empty? should not cause any harm as there is a big hole in the other side of the receiver, the ejection port. Other tan improving the appearance I can see no problems.
You have great day and shoot straight and may the Good Lord smile on you.
-
Bullseye
- Site Admin/Host

- Posts: 6382
- Joined: Sun Aug 14, 2005 12:23 pm
- Location: USA
Post
by Bullseye » Thu Feb 12, 2009 4:19 pm
Good job. I see no safety concerns with the design. It functions just like a Mark II does. I might have even cut it a little closer on the inner side. Anodize it in black and you have a winner there for the blank off plate.
R,
Bullseye
-
boltbusterdw
- New member
- Posts: 21
- Joined: Mon Feb 09, 2009 6:12 pm
- Location: St. Louis suburbs
-
Contact:
Post
by boltbusterdw » Thu Feb 12, 2009 4:56 pm
Once I get my parts in and run a few hundred rounds through it I will post the results. I do feel better having a thumbs up, especially from Bullseye. I made a few extra as you can see and would be willing to send him one for evaluation. If they work out I may make a few more for the forum members. IMHO, the Mark III's looks worse without the LCI(and the open slot) than they do with the plastic LCI.

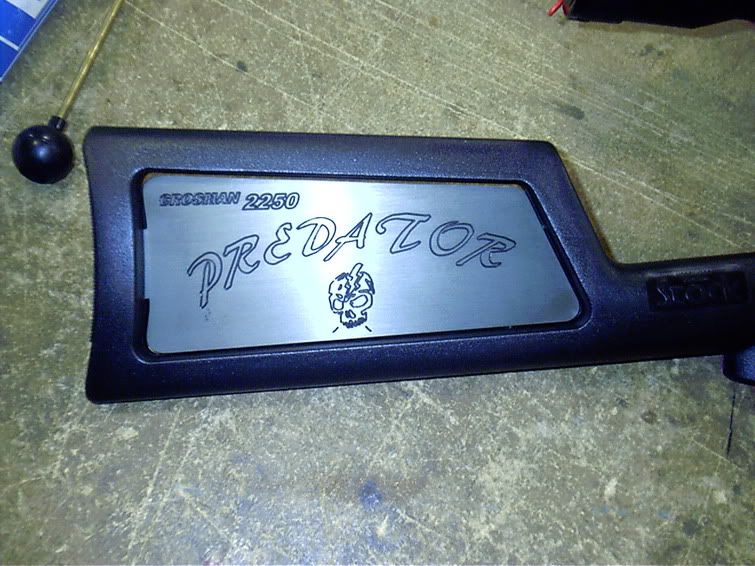
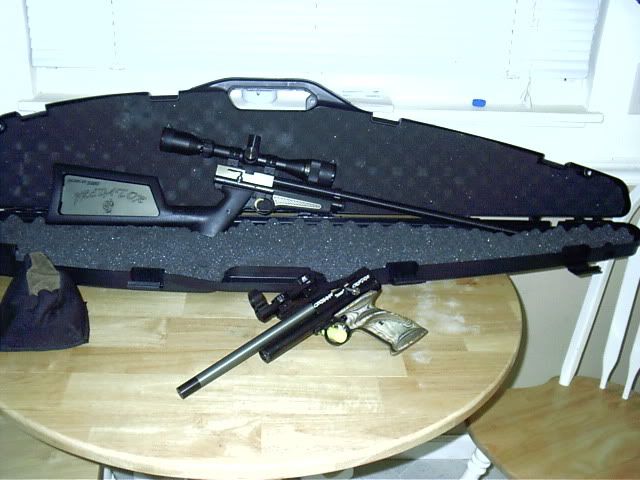
BTW, this is how the color combo(from an airgun project) will look like once anodized...
Finally, an easy way to cut bolts!
-
Bullseye
- Site Admin/Host
- Posts: 6382
- Joined: Sun Aug 14, 2005 12:23 pm
- Location: USA
Post
by Bullseye » Thu Feb 12, 2009 5:45 pm
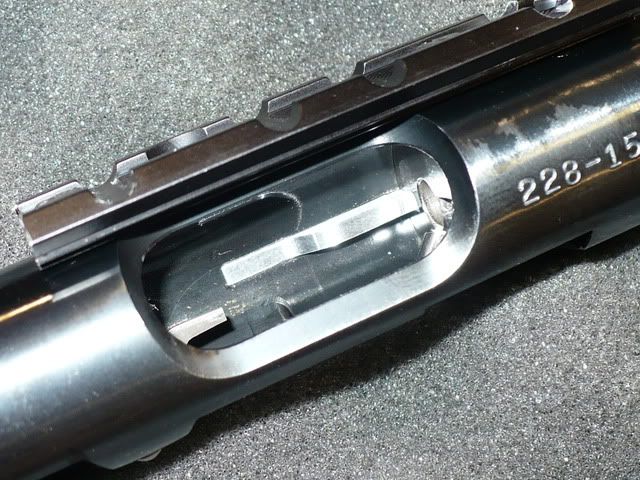
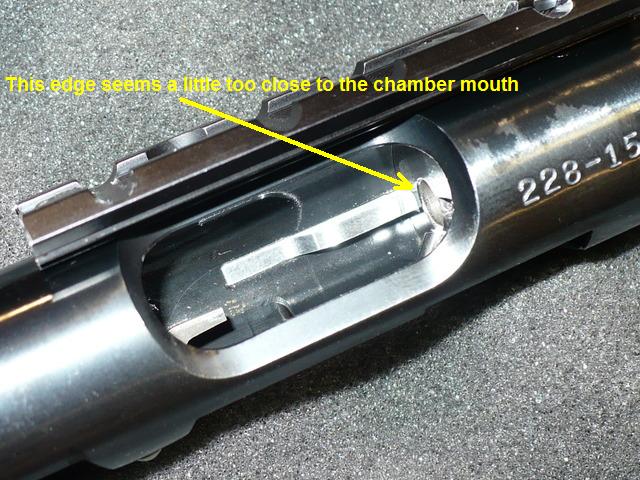
Have you tried drop checking rounds into the chamber? Upon a second look, it is a little hard to see clearly, but the edge of the plate looks a little too close to the chamber wall for the rim of the cartridge - although it could just be the shadow from photo's lighting. How does a cartridge fit?
R,
Bullseye
-
boltbusterdw
- New member
- Posts: 21
- Joined: Mon Feb 09, 2009 6:12 pm
- Location: St. Louis suburbs
-
Contact:
Post
by boltbusterdw » Thu Feb 12, 2009 8:19 pm
Finally, an easy way to cut bolts!
-
Bullseye
- Site Admin/Host
- Posts: 6382
- Joined: Sun Aug 14, 2005 12:23 pm
- Location: USA
Post
by Bullseye » Thu Feb 12, 2009 8:47 pm
That's why I asked, because from the original pictures it looked a lot closer to the chamber. I can see now from the new angles that there's plenty of clearance for the case rim. I see no safety issues with these LCI blank off plates.
R,
Bullseye
-
lucam
- Regular contributor
- Posts: 118
- Joined: Sat Jan 31, 2009 6:41 pm
- Location: Wisconsin
Post
by lucam » Fri Feb 13, 2009 2:47 am
Wow! Good work there! It's cool to see someone work so hard to get a gun exactly how they want it.
My parents bought me a Pellet gun when I was about 13. It was a Crosman with a plastic stock. In a few months I had made a wood stock for it. I had even carved basket-weaves into the grips. My parents thought I was nuts! That was one of my early tinkerings. Now I can't leave anything alone. No matter what it is, I have to make it better, stronger, faster, smoother!
boltbusterdw wrote:I copied the inside profile from the original plastic LCI...
Plastic? Really? When did this start? I thought they were steel...
Edit: inside is plastic, outside steel, got it!
-
Bullseye
- Site Admin/Host
- Posts: 6382
- Joined: Sun Aug 14, 2005 12:23 pm
- Location: USA
Post
by Bullseye » Fri Feb 13, 2009 5:56 am
Plastic? Really? When did this start? I thought they were steel...
Edit: inside is plastic, outside steel, got it!
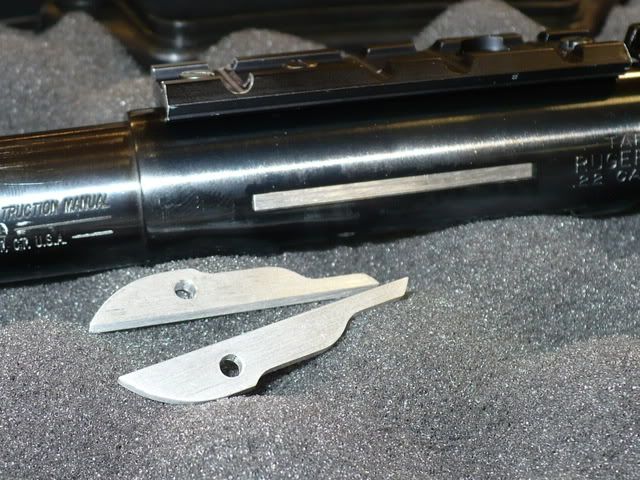
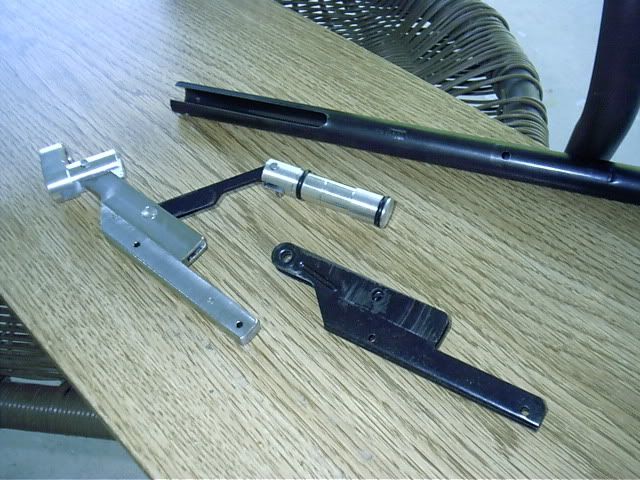
Actually it is the other way around. The newer style are made of two pieces. The outside lever is plastic and a tab inside is spring loaded metal. They've been this way since 2004 when I contacted Ruger and notified them the all metal LCI's were a safety problem. I did some testing and concluded that the metal LCI's could detonate a cartridge if struck firmly from the outside. They shut down the new Mark III production line for two months and redesigned them to the newer two piece style in January 2005. Here's a comparison picture of the old and new LCIs.
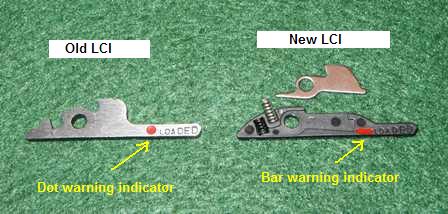
That's right, for those of you new to GTOL and Ruger 22 Auto pistols, I'm the guy responsible for the new style LCI. Needless to say, Ruger wasn't too happy with me at first. But they seem to be over it now. I guess time does heal all wounds. Ruger sent out LCI retrofit kits for the old style LCIs and I got the very first one. So if anyone still has an old style, all metal LCI, you need to contact Ruger and get the retrofit kit for the newer LCI.
R,
Bullseye

-
lucam
- Regular contributor
- Posts: 118
- Joined: Sat Jan 31, 2009 6:41 pm
- Location: Wisconsin
Post
by lucam » Fri Feb 13, 2009 11:15 am
Bullseye wrote:
Thanks Bullseye. I didn't realize they were like this now.
Boltbuster, I have not seen that airgun in years, but it was a good learning experience. Good work on your pistols. Those look like fun!
-
greener
Post
by greener » Sat Feb 14, 2009 8:00 am
Very nice and impressive work. Congrats.
-
lucam
- Regular contributor
- Posts: 118
- Joined: Sat Jan 31, 2009 6:41 pm
- Location: Wisconsin
Post
by lucam » Sat Feb 21, 2009 5:11 am
boltbusterdw wrote:
How about making it out of steel and soldering it in place? Might work better on a S/S model.
-
boltbusterdw
- New member
- Posts: 21
- Joined: Mon Feb 09, 2009 6:12 pm
- Location: St. Louis suburbs
-
Contact:
Post
by boltbusterdw » Tue Feb 24, 2009 5:45 pm
lucam wrote:boltbusterdw wrote:
How about making it out of steel and soldering it in place? Might work better on a S/S model.
No need to solder, the blank cannot pivot as its held tight against the radius on both sides and then pinned in place in the middle.
Finally, an easy way to cut bolts!


