Page 1 of 1
Muzzle Crowners
Posted: Wed Nov 12, 2014 1:21 pm
by charlesb
I am waiting delivery of an 11 degree muzzle crown cutting tool from Pacific Tool and Gauge, the kind that you put in a large tap handle and crank by hand.
https://shop.pacifictoolandgauge.com/in ... c7ppnmi8b5
I'm wondering if anybody here might have tried one of these in the past, and could pass on words of wisdom about using the thing. Problems to avoid, etc..
I intend to re-crown my 1885 Winchester's octagonal barrel with the tool, the present crown doesn't look right to me.
Posted: Wed Dec 03, 2014 6:34 pm
by blue68f100
Charles, Did you ever get this tool. If so how did it work?
Posted: Wed Dec 03, 2014 8:09 pm
by charlesb
I have the tool, but it only came with an adapter on the end for 25 caliber. The #2 tool I got is advertised for 25,27,and 28 caliber and I assumed that I would get all three adapters.
I went to the Pacific Tool and Gauge website to order the other two adapters - and it is offline.
I'll try giving them a call tomorrow... Today I was tied up with motorcycle maintenance and never did get around to calling them.
The tool looks very good, I'll post a picture soon. I have a large tap-handle on order at the local hardware store to crank it with.
Posted: Fri Dec 05, 2014 10:11 pm
by charlesb
PTG's web site came back up, with an apparent remake and some new products. - I gave them a call and have the 270 and 7MM pilots on the way.
The customer service over the phone there is very nice.
The hardware store couldn't get my tap handle, so I found one online and have it on the way too.
Will post a few pictures soon, and will take pictures when I use it to re-crown my 1885 Winchester.
Posted: Fri Dec 12, 2014 7:45 pm
by charlesb
I got the 11 degree crowning tool and its pilots for 25, 270 and 7mm calibers all lined up now. I had to get creative about something to crank it with, though.
I have been wanting to trim the 28" barrel on my 1885 to 24" for some time. The gun weighs 8.5 pounds before a scope is mounted, and is kind of ungainly with the long barrel.
So, I got out my hacksaw, and whacked 4" off of the barrel. It was close to being square, but not quite, so I filed it a bit. The crowning tool would make it even, but by filing it, I reduced the amount of metal I"d have to remove with the tool. The pilot is a metal tube that attaches to the end with a screw on the end of the cutter.
I put a patch in the barrel about two inches down to catch any oil or chips.
Click images to see them larger.
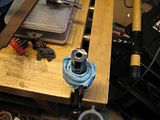
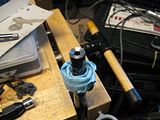
Here's the crowning tool, and my system for cranking it.
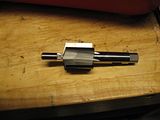
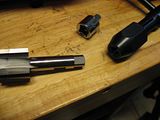
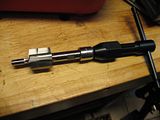
The chrome do-dad is a 3/8 to 1/4 drive adapter. The small end goes in the tap handle, the crowning tool shank fits in the big end.
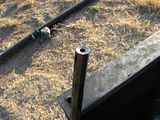
Here it is, set up to cut.
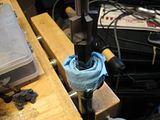
Here's the first cut, and what it looked like when it was all done. I would remove the tool often to clean off chips and re-oil the end of the barrel.
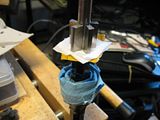
Then I put a few patches on the end of the tool, followed by 220 grit, then 330 grit wet-or-dry paper, wet. The tool forced the sandpaper to the contour of the crown. I'd make a 1.5" square of paper, then cut a small square hole in the center so it would slide down past the pilot.
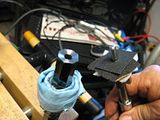
After I got it smoothed up, I cold blued it and now the rifle is shorter, lighter, handier and as an added bonus, it's more accurate.
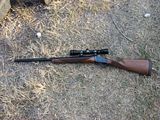
I fired a quick group close to sundown to check it out... Five rounds of my reduced loads into .310" at 50 yards. I tried two full-power 270 WSM loads, and they were about 1/4" apart.
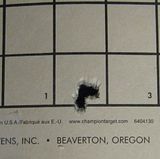
So, I can say the Pacific Tool and Gauge 11 degree muzzle crowning tool does a good job. - They have tools for all kinds of muzzle crowns, but I prefer the 11 degree crown, all the way out to the full diameter of the barrel. This seems to work best for me.
Posted: Sat Dec 13, 2014 9:06 am
by blue68f100
Looks good and shoots good.
Did you have any problems with chips getting in to the barrel while cutting the crown?
Posted: Sat Dec 13, 2014 10:17 am
by charlesb
The pilot kept any chips from getting in the barrel as I was cutting, but when I removed the cutter to re-oil and remove the chips, sometimes they would fall down into the barrel if I wasn't very careful cleaning it off. I used a small chip brush, the kind with the rolled metal handle.
When I was finished and pushed the plug of patch material out of the barrel from behind, it had some very fine chips on it but not very many.
At one point I got tired from cranking the cutter, and put the 1/4" end of my 1/4-3/8 drive adapter into the chuck of an electric screwdriver. When I did this, the cutting went a lot faster and I got chips all over the workbench. The chatter was worse too, and to reduce it I had to go back to cranking the cutter by hand, very slowly with light pressure.
That got the chatter marks down to the point where the sandpaper could deal with it, smoothing things out.
Other users of this tool have talked about chatter being a problem. PTG offers it in a variety of shapes... One reason I choose the straight 11 degree crown shape was that it was easy to finish out, by putting sandpaper squares on the tool, with a hole in the center for the pilot to go through. For the more complicated crown shapes, a different method of polishing it out would have to be used.
A felt or cloth spacer behind the sandpaper would probably let it conform to shape.
The most significant benefit I got out of it was reducing the weight of the rifle by a pound, and the way it transformed the rifle's handling qualities. Now the balance point is three inches ahead of the action, just about perfect for me.
The 1885 started off at 8.5 pounds with no scope... Now with the compact Leupold 2-7 on it, the weight is around 8 pounds even, about right for a magnum hunting rifle. Comparatively, it now handles like a dream, a lot more like a hunting rifle should.
Gripping the rifle one-handed like it was a pistol, I can relax my arm where the rifle dangles at my side, and the muzzle winds up about about 3-4 inches off of the ground. - Previously, it would have wound up in the dirt if I tried that.
Posted: Sun Dec 14, 2014 5:07 pm
by bgreenea3
Nice work....

Posted: Sun Dec 14, 2014 7:10 pm
by Bullseye
I'm surprised you didn't try using the quill on the vertical mill at an extremely slow speed, would have reduced any chattering. In any case, you got it done nicely.
R,
Bullseye
Posted: Sun Dec 14, 2014 7:46 pm
by charlesb
My mill, lathe and most of my welding equipment is still in storage, will need to build a shop on the property before I can set them up.
I'm down to a drill press, a grinder, a vice and hand tools, at this point.


